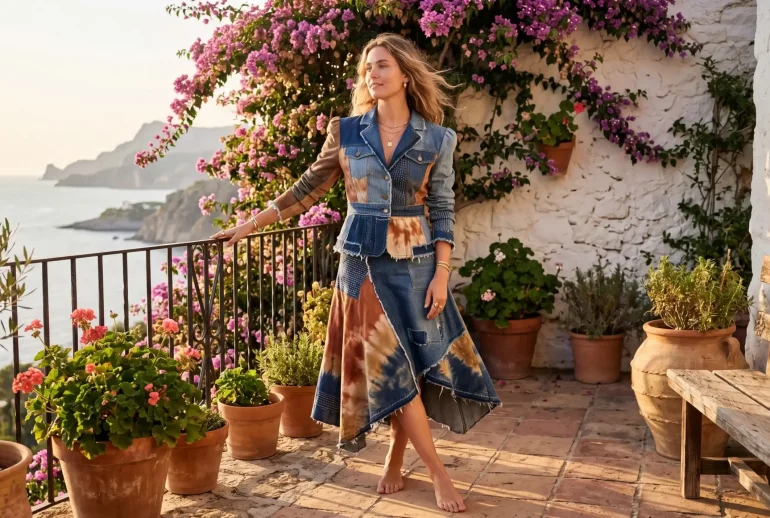
Upcycled Fashion Ideas: 15 Stylish Thrift Flip Outfits Anyone Can Make
“The most original thing in your wardrobe won’t come from a store. It’ll come from your own two hands.”
These 15 upcycled fashion ideas turn forgotten thrift finds into pieces people will actually ask you about — no sewing machine required.
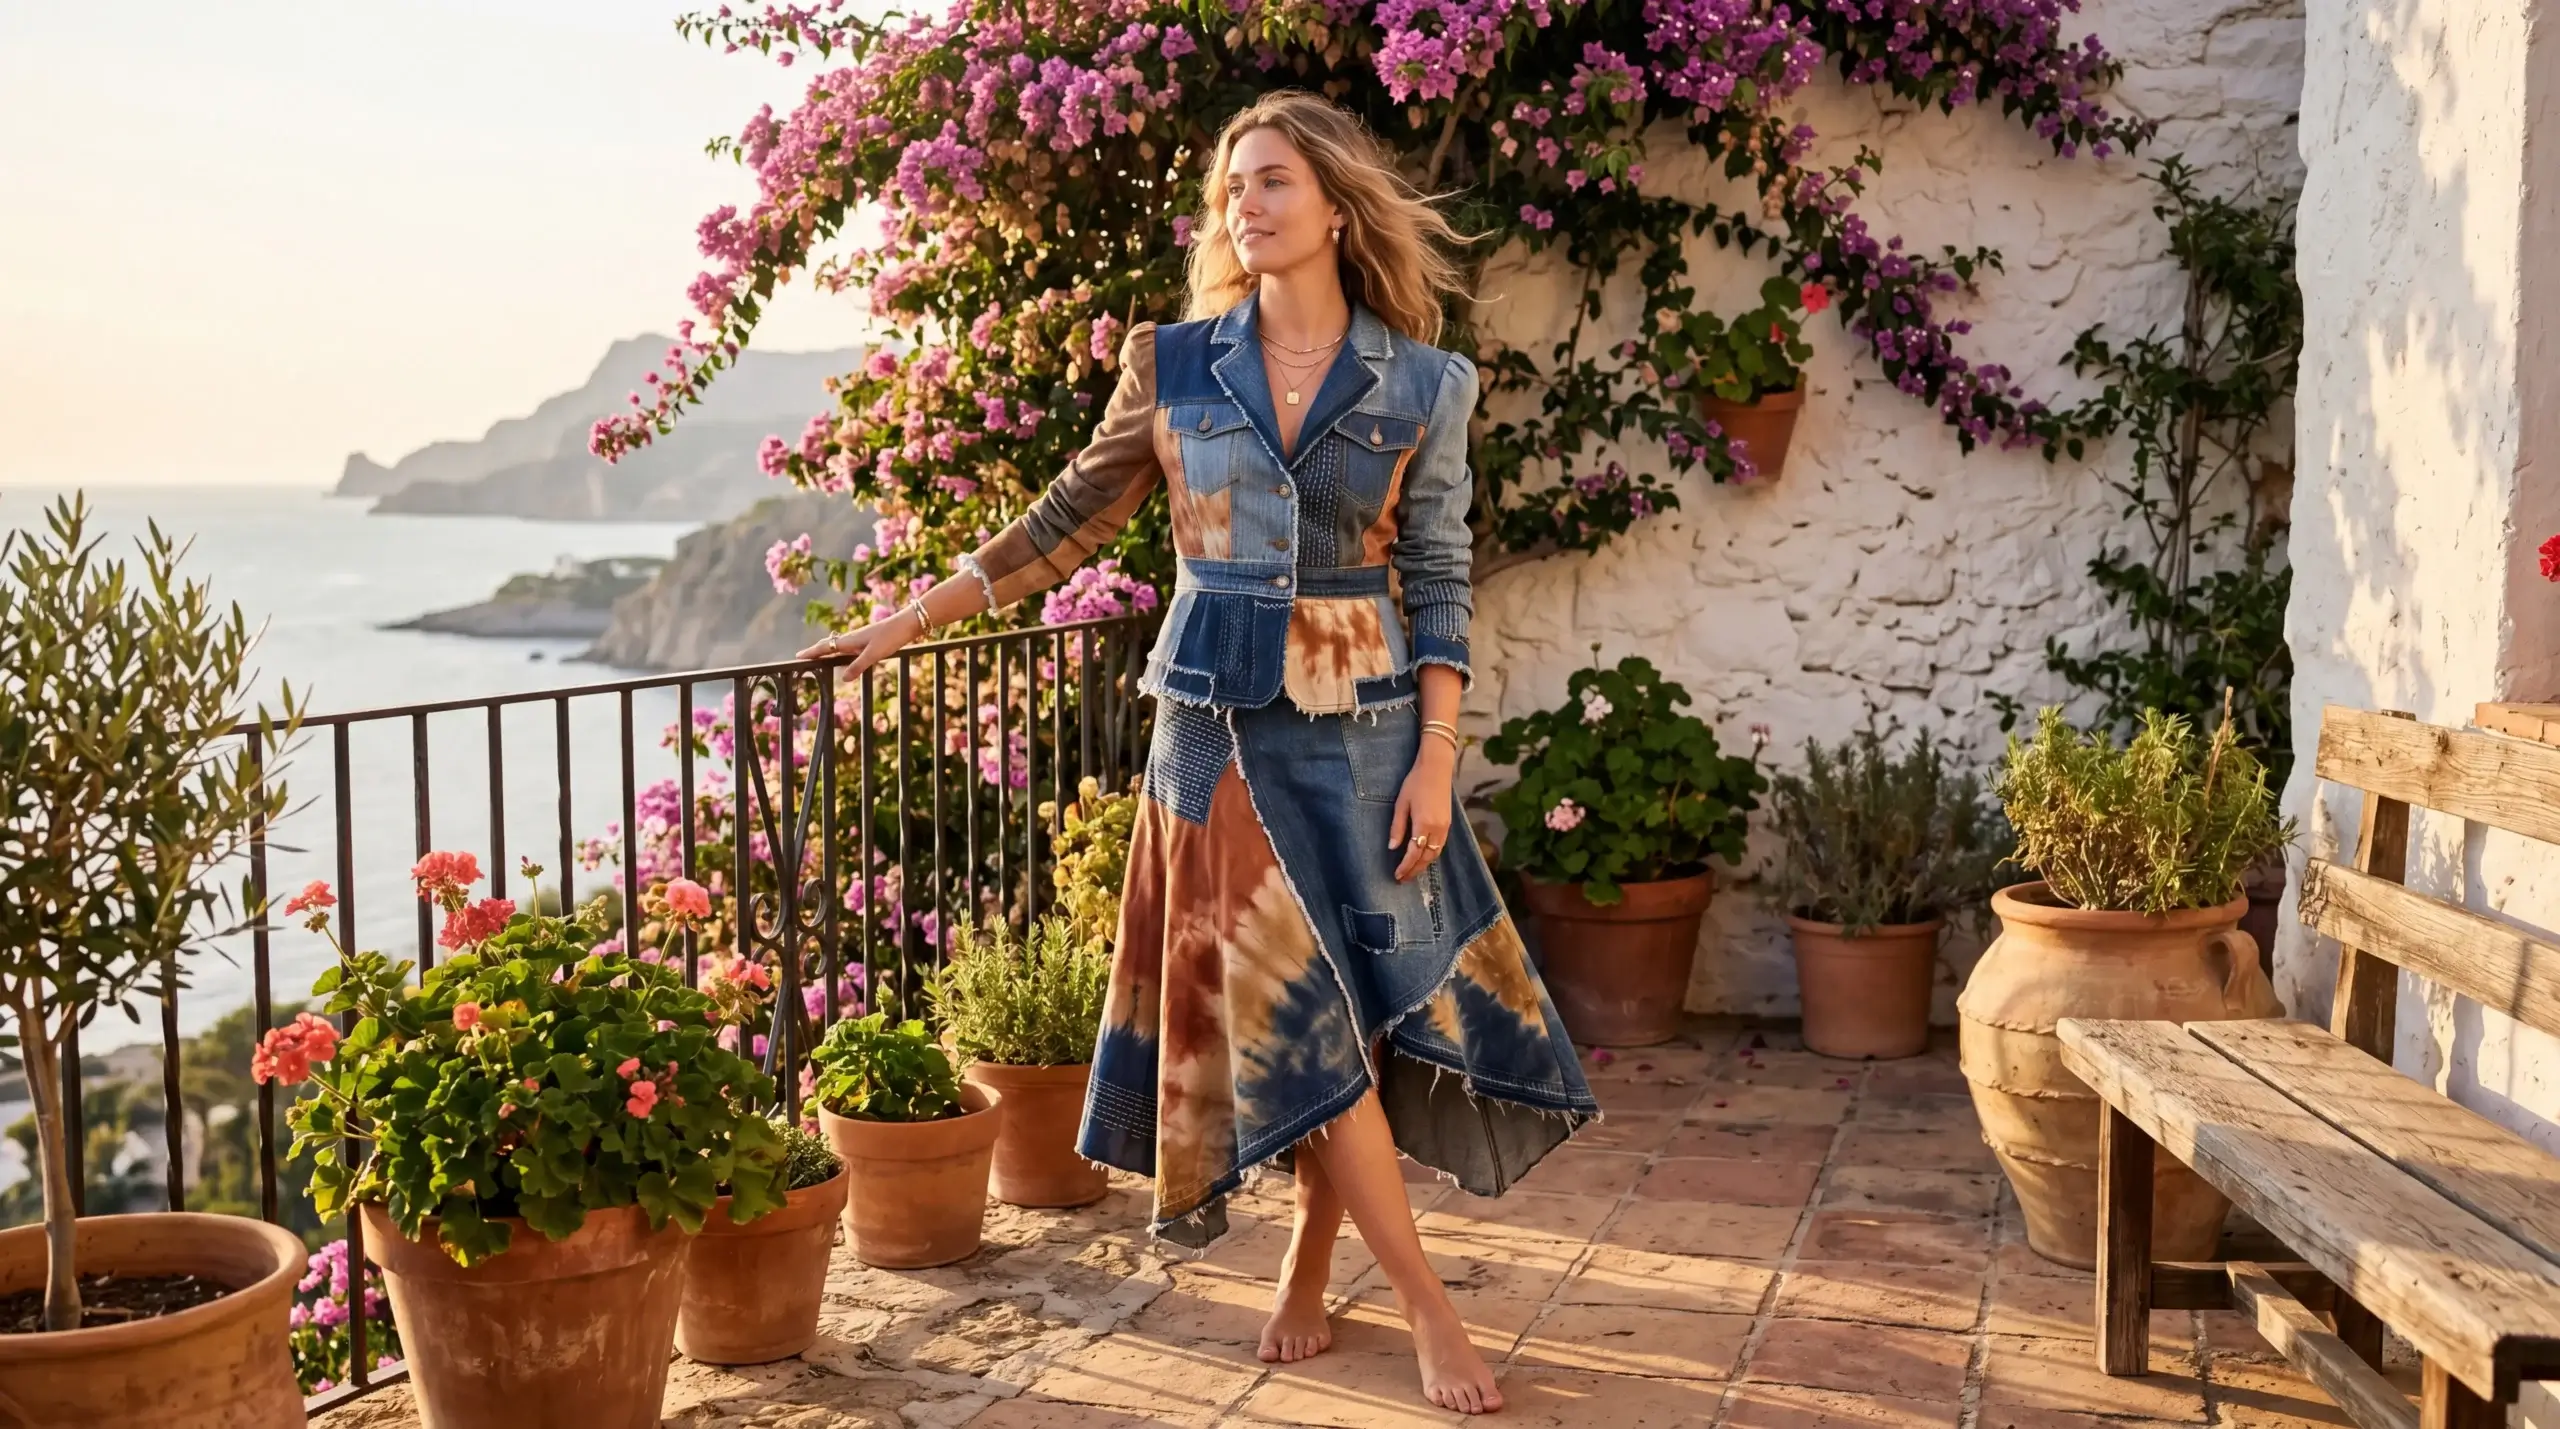
Why Upcycled Fashion Ideas Are Worth Your Weekend
A thrift flip is simple: take something secondhand and undervalued, and turn it into something you genuinely want to wear. That is the whole heart of upcycled fashion.
The magic is that almost none of it requires real skill. Most of the best thrift flip ideas use glue, paint, dye, or a few hand stitches — and they take an afternoon, not a sewing course. You are not manufacturing clothes. You are giving a good piece a second, better life.
Below are 15 upcycled fashion ideas, numbered and grouped so you can start anywhere. Whether you want a five-minute no-sew win or a full patchwork project, there is a beginner thrift flip here with your name on it. And if today turns out not to be a crafting day, there is an honest answer for that at the end too.
🌿 Quick Picks: Buy the Look
Not in a crafting mood? These are the ready-made pieces mentioned in this guide — every one checked in stock on the seller’s own site:
The Mosaic Maxi ↗
The Linen Skirt ↗
The Wool Coat ↗
The Darning Mushroom ↗
The Mending Guide ↗
The Bucket Hat ↗
The Printed Tee ↗
1. Customize a Denim Shacket Into a Statement Piece

An oversized denim shacket is the perfect blank canvas. The relaxed, boxy back panel is begging for patchwork, lace inserts, embroidery, or fabric paint. Start with one clean shacket and apply any technique from this guide to make it unmistakably yours.
It is the upgrade project that ties all your new skills together.
What to look for: a roomy back panel — that is your design surface — in a versatile mid-weight denim that takes paint and patches well. Wash it once before you decorate to remove any sizing finish, or the paint and glue will not bond properly.
Pro Tip: Plan your back-panel design on paper first, then lay the pieces out with double-sided tape before committing. It saves costly mistakes on a large piece.
A Recycled-Cotton Denim Jacket
Why We Love It: The customising ideas above need a good blank to start from, and this is one: a vintage-cut biker-style denim jacket made with recycled fabric, washed and finished with eco flaps and zips. Wear it as it is, or make it the canvas for everything you have learned on this page.
Best For: Wearing straight away, or as the base for your own patches, paint and pins.
- 80% cotton with 20% recycled cotton
- Iconic vintage biker silhouette with a washed finish
- XS to XL
Pro Tip: Add your first patches to the back panel. It is the largest flat area and by far the easiest place to learn on.
Heads Up: The recycled content here is 20%, not 100% — a real improvement on virgin denim, not a perfect garment. We would rather say so than round it up. A thrifted jacket is still the greener option if you can find one that fits.
The Blank Worth Customising 🌿
80% cotton, 20% recycled cotton
2. Patch Worn Denim So It Reads as Design
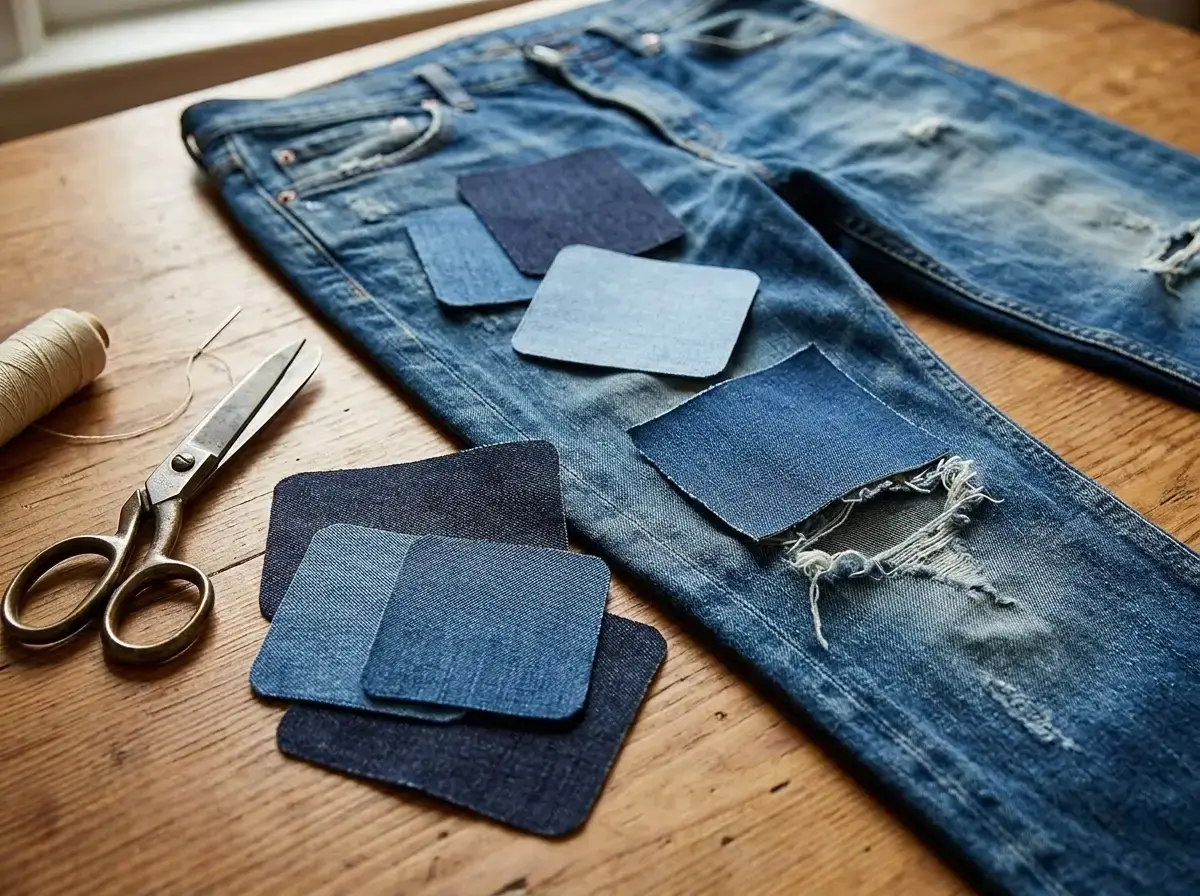
Holes and worn knees do not have to mean the end. Visible mending turns a flaw into a feature — a patch of contrasting denim that says the piece was loved and saved on purpose. This is upcycled denim fashion at its most honest, and it is having a real moment.
What to look for: iron-on denim patches in a range of indigo washes, so the patch blends with vintage denim and reads as design rather than repair.
Pro Tip: Place a patch behind a thin or worn area as well as over it — sandwiching the weak spot makes the repair last far longer. On knees, add a few hand stitches around the edge after ironing so the corners cannot lift.
3. Try Sashiko-Style Visible Stitching
Sashiko is the running stitch used across Japan to reinforce and decorate worn cloth, and it is the reason visible mending looks intentional instead of accidental. Rows of small, even stitches over and around a worn patch — usually pale thread on indigo denim — turn a repair into the best-looking part of the garment.
What to look for: a seam ripper and a few matching threads, so you can open a seam cleanly and stitch without fighting the fabric. Learn one stitch — the running stitch — and you can handle most beginner mending and decorative sashiko lines.
Pro Tip: Keep your stitch length even and your rows parallel. Evenness, not neatness, is what makes hand stitching look deliberate.
Not sure your mending will look deliberate rather than accidental? That is the one skill here genuinely worth learning from someone who does it well.
A Proper Mending Guide
Why We Love It: Visible mending is a craft, and this is a printed, updated guide to mending woven garments — the stitches, the order they go in, and, most usefully, where to stop. It answers the question every first-time mender has: how do I make this look intentional?
Best For: Anyone whose first patch went lumpy. Jeans, shirts, jackets, tote bags.
- Written for woven garments — denim, cotton, canvas
- Printed, so it survives an actual work table
- The cheapest thing on this page by a distance
Pro Tip: Practise the stitch on a scrap from a garment you have already given up on. Nobody’s first darn is pretty, and that is not a reason to stop.
Heads Up: Straight with you — this guide is published by a children’s clothing brand, and the examples lean that way. The technique on a woven adult garment is identical, but if you were expecting an adult-fashion book, it is not that.
Learn the Stitch Properly 🌿
A printed guide for woven garments
4. Darn a Hole Properly, Over a Curved Surface
A darn is what you do when there is nothing left to patch onto — a hole in a sock heel, a thinning elbow, a sweater that caught on something. The trick every beginner misses is support: fabric needs to sit taut over a curved surface while you stitch, or the repair puckers and pulls the moment it is worn.
What to look for: a curved wooden darning mushroom. It is the oldest tool in mending and still the best, because nothing else holds the fabric at the right tension for you.
Pro Tip: Work your stitches well past the edge of the hole and into the sound fabric around it. Mending only the hole itself is exactly why repairs tear again right next to the patch.
A Beechwood Darning Mushroom
Why We Love It: The oldest mending tool there is, and still the best one. You slip the curved head under a hole and the fabric sits taut over it, so your stitches stay flat and even instead of puckering. It is the difference between a repair that looks considered and one that looks like a knot.
Best For: Sock heels, sweater holes, worn elbows and knees — anywhere the fabric needs support while you stitch.
- Handmade in Germany from untreated beechwood
- Curved head, about 5 inches — no sizing to get wrong
- Cheap enough to be an easy first step into mending
Pro Tip: A smooth, unvarnished surface matters — anything tacky will catch your thread and drag the weave.
Heads Up: It is a bare wooden tool, not a kit — no needles or thread come with it. It also cannot help you on stretchy knitwear, where a hole needs closing rather than supporting.
The Oldest Mending Tool There Is 🌿
Untreated German beechwood, handmade
5. Build a Patchwork Skirt From Flannels and Jeans
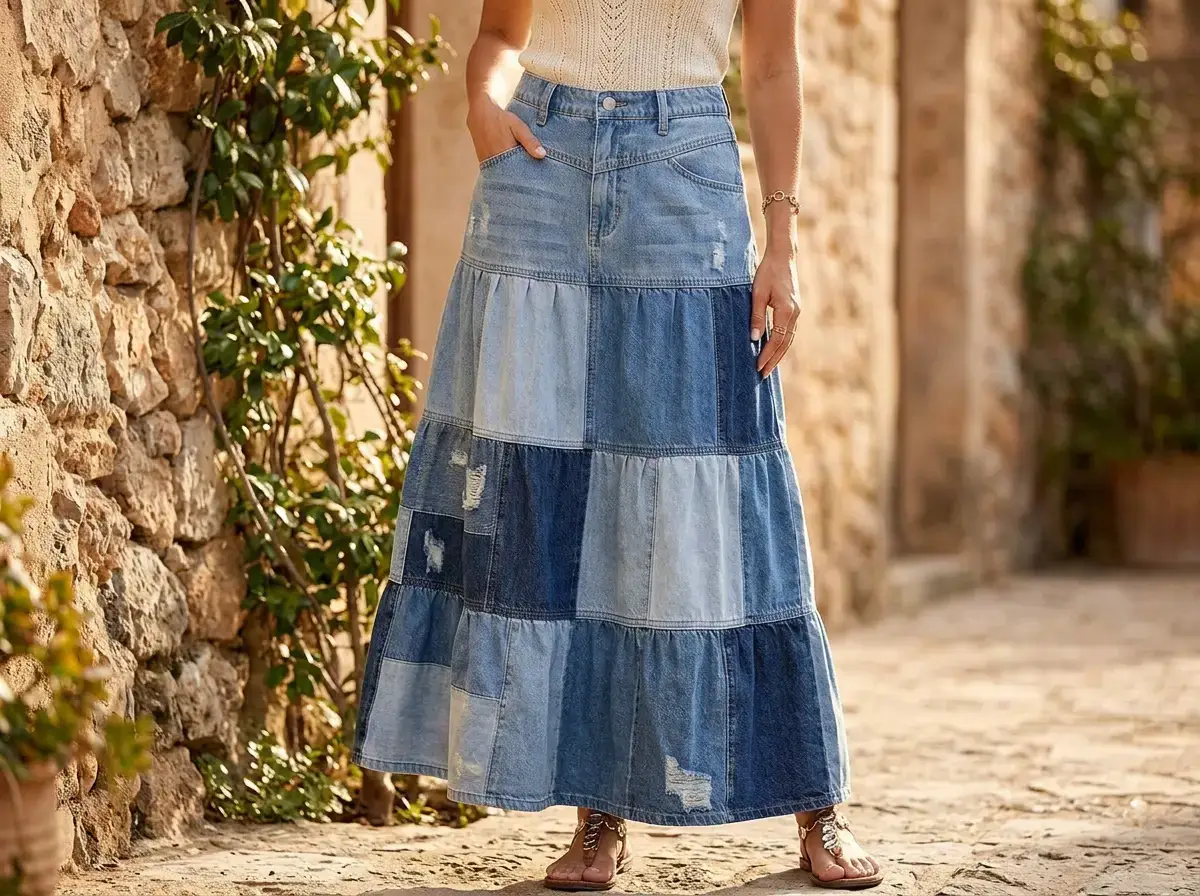
One of the most loved thrift flip outfits is the patchwork skirt — strips of mixed denim and plaid flannel stitched or glued into a boho panelled skirt. The secret is starting with the right raw materials: rigid, non-stretch denim and a few contrasting flannels.
What to look for: rigid, non-stretch cotton denim, because it holds a clean edge and a stable panel when you cut it — stretch denim will not. A few mixed-plaid flannels give you instant pattern contrast and do the styling work for you. Thrift both first; buy new only to fill a gap secondhand could not.
Pro Tip: Save the back pockets, waistbands, button plackets and cuffs — they make ready-made design features rather than offcuts.
Want the patchwork look today, and the project another weekend? This is the closest ready-made version — and a useful thing to study before you cut a single panel.
A Mosaic-Print Maxi Dress
Why We Love It: This is the ready-to-wear answer to the whole page: the patchwork look, in one piece, with nothing to build. It is cut from Bemberg — a regenerated cellulose crepe — with side slits and a boxy slip shape that moves beautifully.
Best For: Days that are not crafting days. Warm weather, travel, capsule wardrobes.
- 100% Bemberg, a regenerated cellulose crepe
- Mosaic patchwork-inspired print with side slits
- Seven sizes, all in stock
Pro Tip: Layer an oversized knit and ankle boots over it and it carries straight into cooler months.
Heads Up: Be clear on this — the mosaic is a print, not pieced patchwork. Nothing was sewn together to make it. If you want real patchwork with real seams, the method above teaches you to build it, and yours will be one of one.
The Whole Look, Ready to Wear 🌿
100% Bemberg, a regenerated cellulose crepe
6. Hem Anything With Iron-On Tape
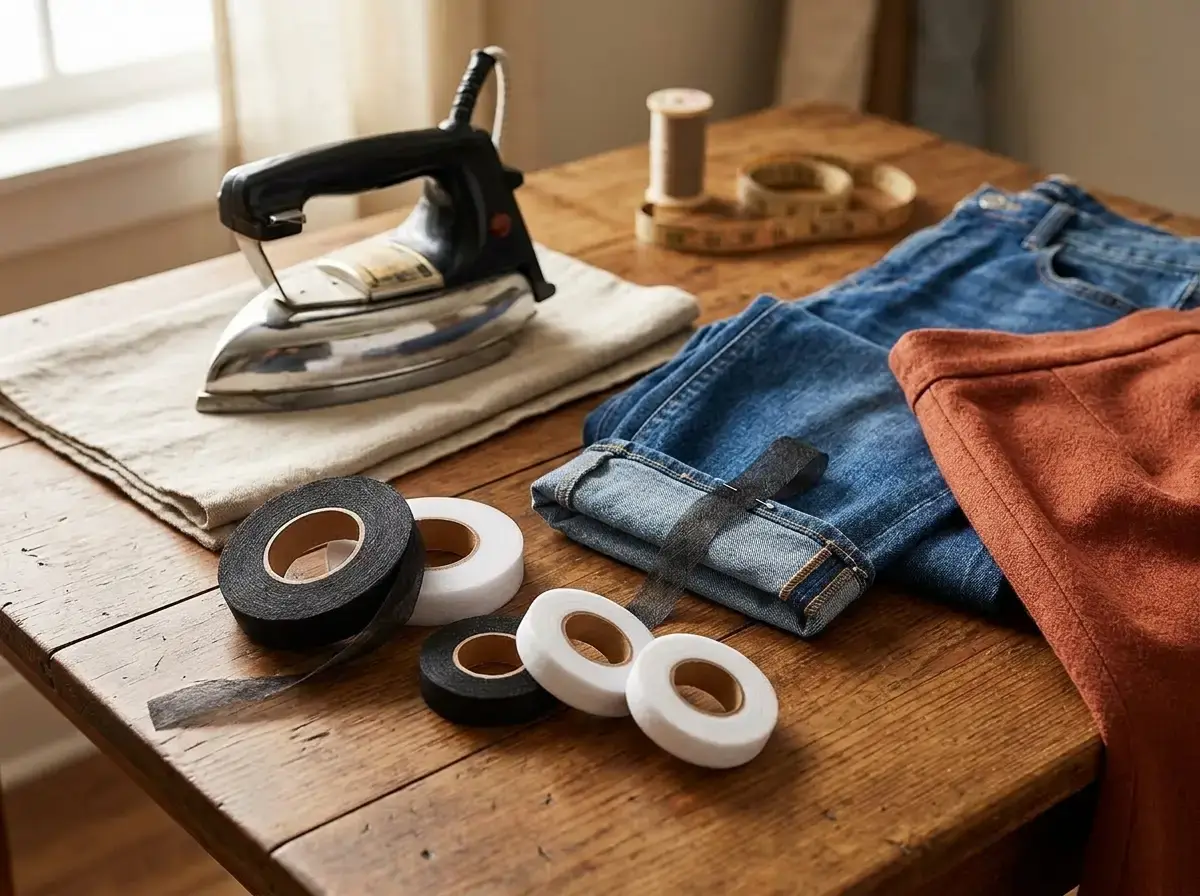
If a sewing machine is what is stopping you, stop worrying about it. Iron-on hem tape takes up jeans, skirts and trousers with nothing but a household iron, and the bond holds through normal wear and washing.
What to look for: a heat-activated tape rated for heavyweight fabric if you are working on denim. Press firmly for the full recommended time and let the garment cool completely before you move it — that cool-down is what actually sets the bond, and rushing it is the single most common reason a no-sew hem fails.
Pro Tip: Test any adhesive on a hidden seam first to check the heat setting before you commit to the visible edge.
7. Glue Lace, Trims and Delicate Edges
Fabric glue is the secret behind half the flips you have scrolled past. It secures lace inserts, pocket trims and appliqué — the delicate edges that iron-on tape would scorch — and it dries clear and flexible, so the fabric still moves naturally.
What to look for: a permanent, washable glue that stays flexible when dry. Very thin or stretchy fabrics hold far better with glue than with tape, so match the method to the material rather than to the project.
Pro Tip: Apply a thin line, press for thirty seconds, then leave it overnight before wearing or washing. Too much glue soaks through thin fabric and takes days to cure properly.
8. Hold a Layout With Double-Sided Fabric Tape
This is the one nobody tells beginners about, and it saves the most mistakes. Double-sided fabric tape is removable, which makes it perfect for trying a look before you commit to it — a hem turn-up, a gaping neckline, or holding a panel exactly where you want it while you decide.
What to look for: a clear, thin tape that lifts cleanly off most fabrics without leaving marks.
Pro Tip: Use it to “pin” your whole layout in place before gluing or stitching anything. It is the difference between a panel set straight and a panel set crooked and permanent.
9. Revive a Dingy Thrift Find With Tie-Dye
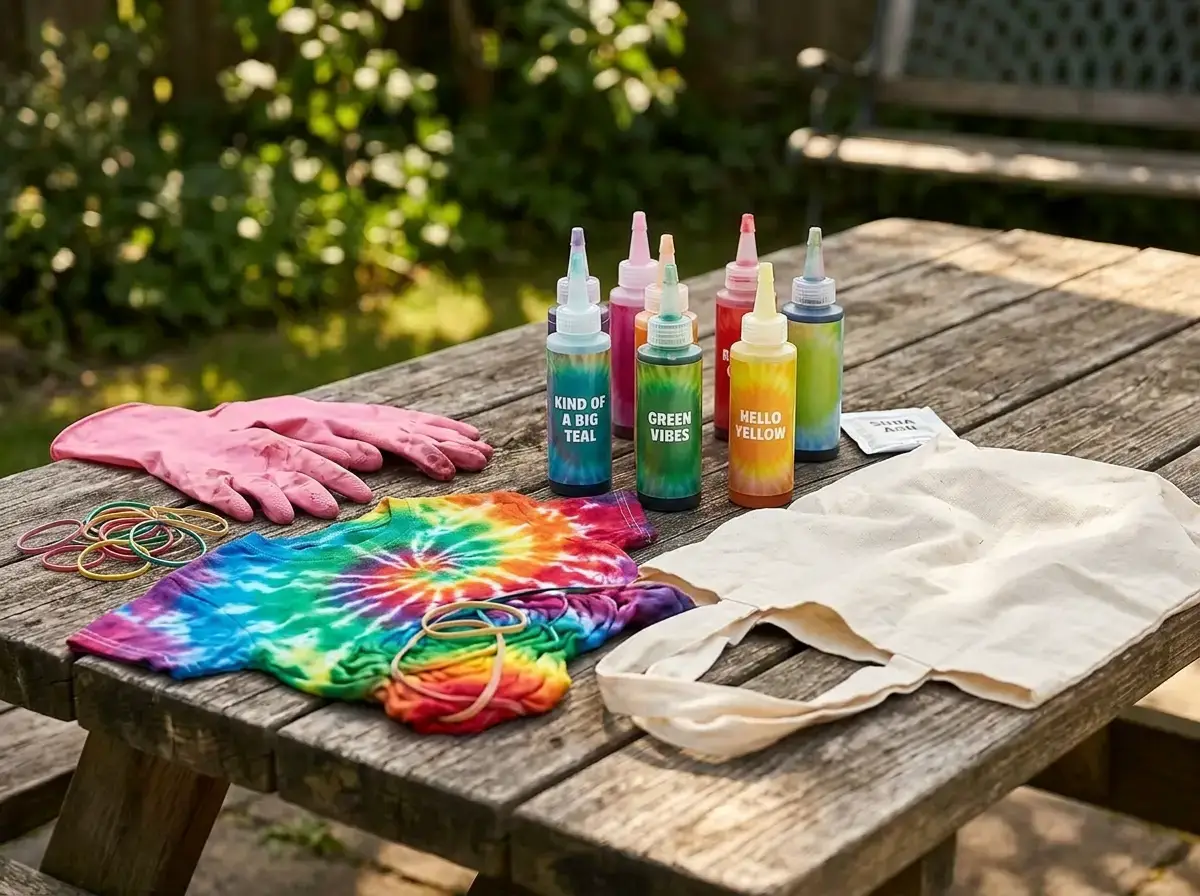
A stained white tee, a faded tote, or yellowed denim shorts are not rubbish — they are blank canvases. Tie-dye is the single most satisfying beginner thrift flip because the results look incredible and you almost cannot get it wrong.
Natural fibres like cotton and canvas take the colour best, so check the label for high cotton content before you start.
What to look for: a one-step kit, where the dye is pre-measured and the gloves and bands are in the box. There is no mixing chemistry and no guesswork. Lay down a bin bag first — dye stains every surface it touches.
Pro Tip: Dampen the fabric first and wring it out — slightly wet fabric lets the dye bleed into those soft, blended patterns instead of harsh lines. Then let the dyed piece sit wrapped in plastic for 6–8 hours before rinsing. Patience here deepens the colour dramatically.
An Up-Cycled Cotton Bucket Hat
Why We Love It: Someone else already did the dyeing, and did it properly. It is a 100% cotton hat with a hand-finished tie-dye band, and the maker describes it as up-cycled — so the technique arrives on a piece that will not run in the first wash.
Best For: Testing the look before you dye your own. Sun days, bad hair days, festivals.
- 100% cotton, described by the maker as up-cycled
- One size, so there is no sizing lottery and no returns
- The maker is a 1% For The Planet member
Pro Tip: Keep it beside you while you dye your own tee. Copying a pattern you can hold in your hands beats copying one off a screen.
Heads Up: It is an accessory, not a garment. If what you actually want is a tie-dyed outfit, the method above is still the cheaper route by a wide margin — this is the shortcut, not the upgrade.
The Technique, Without the Mess 🌿
100% cotton · maker is a 1% For The Planet member
10. Cut Clean — the Rule That Saves Garments
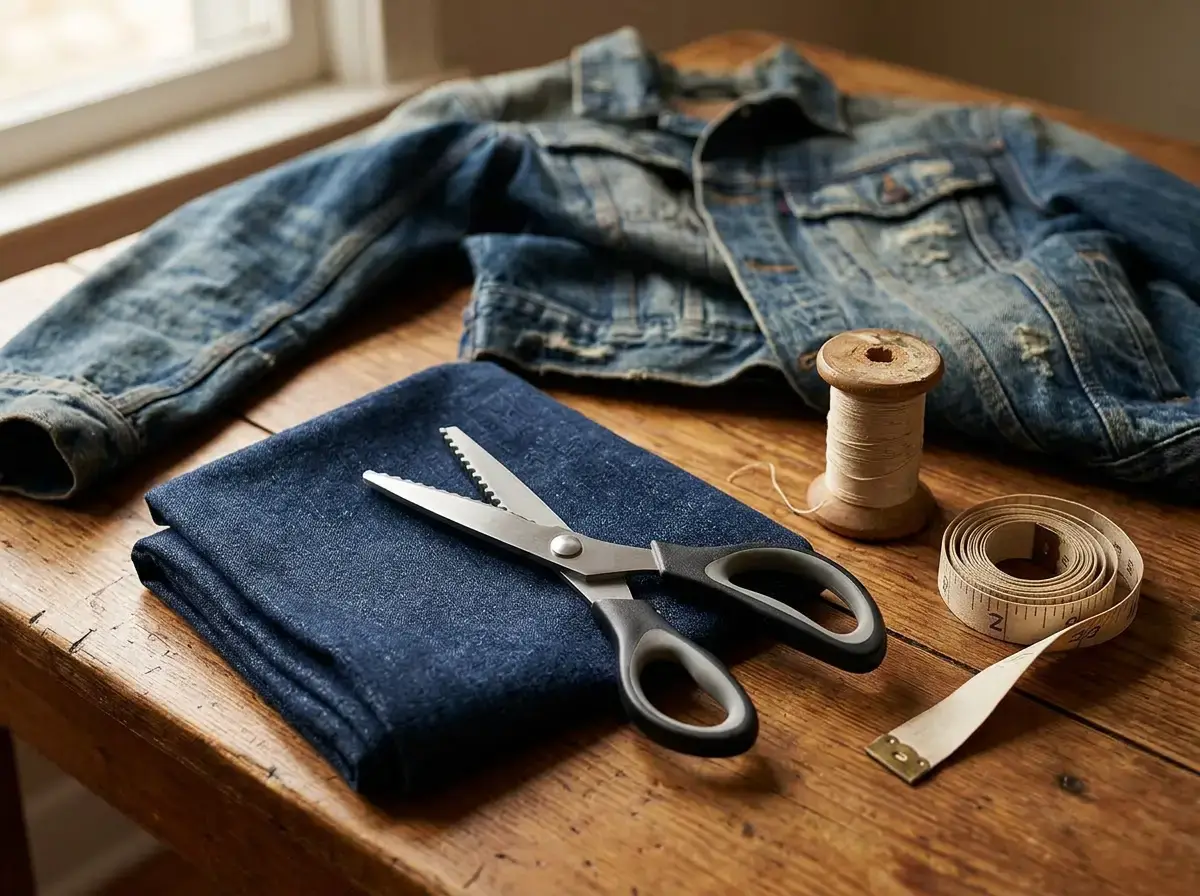
Every thrift flip begins with a cut, and a clean cut is the difference between an intentional design and a ruined garment. Sharp fabric scissors stop denim and cotton from fraying into a mess.
What to look for: heavy-duty blades that power through layered denim without dragging, and a grip comfortable enough for a long cutting session. Keep them for fabric only — cutting paper or tape dulls the blade fast. If yours ever feel blunt, a few passes through aluminium foil lightly re-hones the edge.
Pro Tip: Mark your cut line with chalk or a washable marker first, then cut just outside the line. You can always trim more; you can never put fabric back.
11. Wash and Prep Before You Cut a Thing
This is the least exciting idea on the page and the one that rescues the most projects. Thrifted cotton and denim shrink — sometimes a full size — and they shrink the first time you wash them. Assemble a patchwork skirt from unwashed panels and it will pull itself crooked the first time it goes through a machine.
What to look for: wash and dry every source garment the way you intend to wash the finished piece, so any shrinkage happens before you cut rather than after. On anything you plan to paint or glue, one wash also strips the sizing finish that stops adhesive bonding.
Pro Tip: Press everything flat before you measure. A crease reads as an extra centimetre, and on a panelled skirt those centimetres compound into a hem that will not sit level.
12. Paint a Statement Back Panel
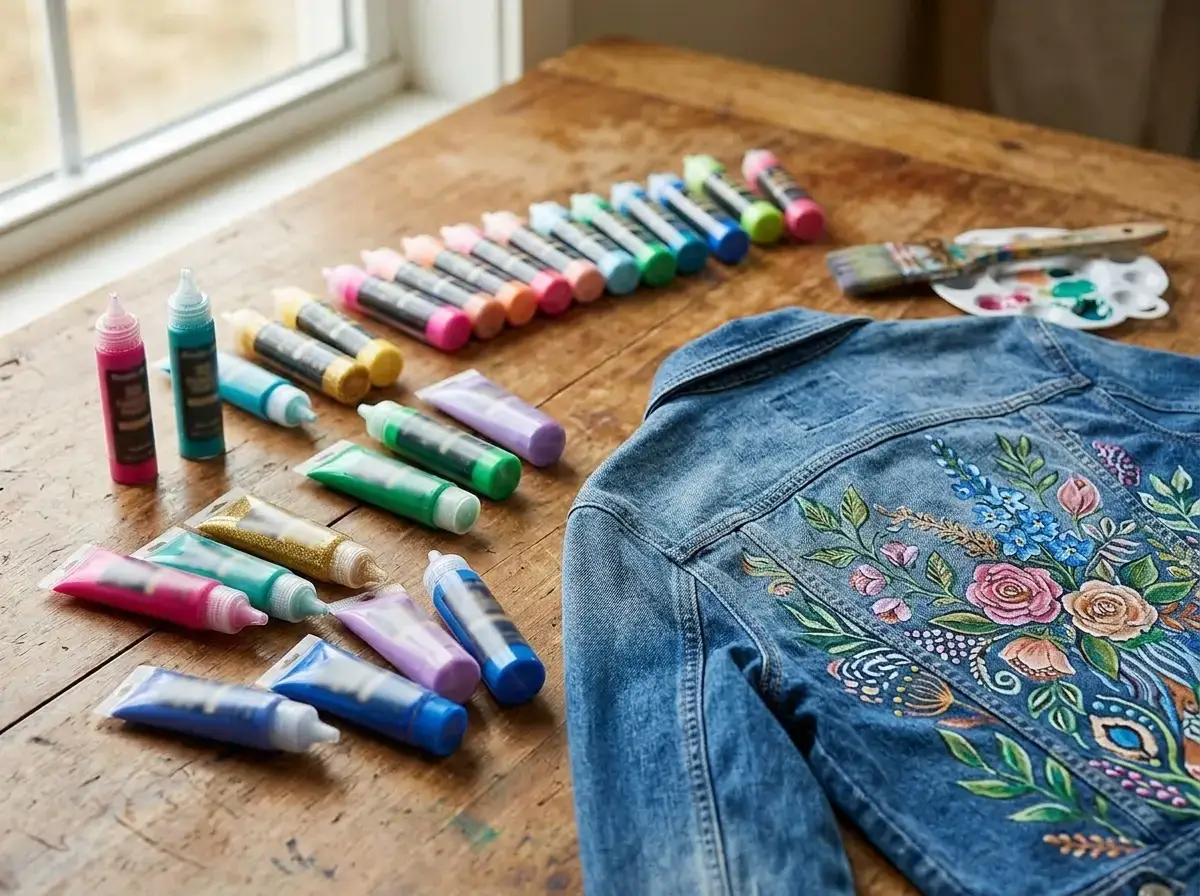
A plain thrifted jacket or pair of jeans is the perfect place to make something one-of-a-kind. This is where your wardrobe stops looking bought and starts looking yours.
What to look for: 3D fabric paint gives rich, permanent colour with a raised finish you can feel — ideal for a painted pocket or a full statement back panel.
Pro Tip: Slide a piece of cardboard inside the garment before you paint so colour cannot bleed through to the back layer. Once dry, place a cloth over the design and press with a warm iron — that heat-set is what locks it in through the wash.
A Ready-Printed Organic Cotton Tee
Why We Love It: If your hand-painting is not there yet, a well-printed tee shows you what good placement looks like — where the art sits, how large it goes, how much space it needs to breathe. It is a reference piece you can also just wear.
Best For: Studying composition before you commit paint to a garment. Everyday wear.
- 100% carded cotton
- Runs XS to XXL — a real size range, which is rarer than it should be
- Print placement worth copying onto your own blank
Pro Tip: Lay it flat beside your blank tee before you start painting. Placement is most of what makes hand-painted clothing look deliberate rather than accidental.
Heads Up: It is printed, not hand-painted — so it will never have the one-off texture your own brush leaves behind. That texture is the entire point of the method above, and no print can give it to you.
A Reference Piece Worth Owning 🌿
100% carded cotton
13. Draw Fine Detail With Fabric Markers
If liquid paint feels intimidating, markers are the zero-mess way in. They illustrate fine detail straight onto jeans, collars or canvas bags with full control — no brushes, no spills, just draw.
What to look for: dual-tip markers, so one pen gives you both bold fills and fine lines. They work best on lighter fabrics; dark denim usually needs a paint pen for bright colour to show at all.
Pro Tip: Sketch your design lightly in pencil or washable chalk first, then trace over it. Confident lines are what separate hand-drawn from scribbled, and nobody draws confidently straight onto a garment they care about.
14. Turn a Woven Blanket Into a Coat
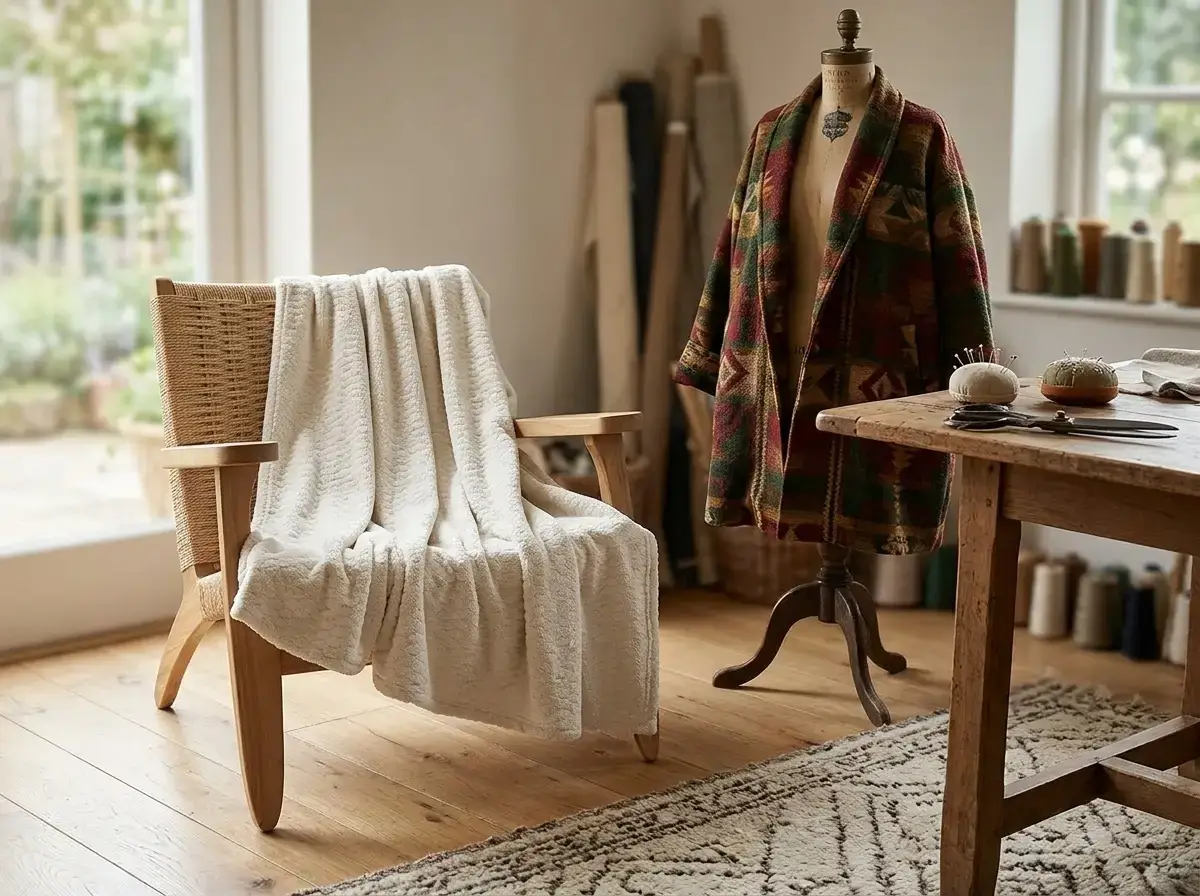
The blanket coat is the showstopper of upcycled fashion ideas. A patterned woven throw becomes a cosy, tapestry-style coat that looks designer and costs a fraction of one. This one is a step up in effort — but the payoff is a genuine statement piece.
What to look for: a generous woven throw in a pattern that reads as tapestry rather than bedding, big enough to cut full garment panels from. Finish the cut edges with iron-on hem tape or a simple blanket stitch so the coat looks polished rather than raw.
Pro Tip: Use a coat you already own as a template — lay it flat on the blanket and trace your panels, so the fit is right the first time.
Want the silhouette without cutting into anything? This is what the idea looks like when a tailor does it — and the shoulder construction alone is worth studying before you cut your own.
A Roll-End Wool Coat
Why We Love It: Cut from roll-end melton wool — the surplus at the end of a mill run — and lined with deadstock satin, so the entire coat is made from material that already existed. It is the blanket-coat idea, executed properly, with rounded drop shoulders and three-quarter sleeves.
Best For: Cold mornings, and anyone who loves the silhouette but not enough to cut up a blanket they love.
- Roll-end melton wool, lined in deadstock satin
- Rounded drop shoulders and three-quarter sleeves
- Full size run, XS to XL
Pro Tip: Look closely at how the shoulder is built before you cut your own panels. That seam is the part home-made blanket coats most often get wrong.
Heads Up: This is by far the most expensive piece on this page — genuinely an investment, not an impulse. If that is not this month, the method above makes the same silhouette from a charity-shop blanket for a fraction of it.
The Tailored Version of This Idea 🌿
Roll-end melton wool, deadstock satin lining
15. Make the Viral Napkin Skirt
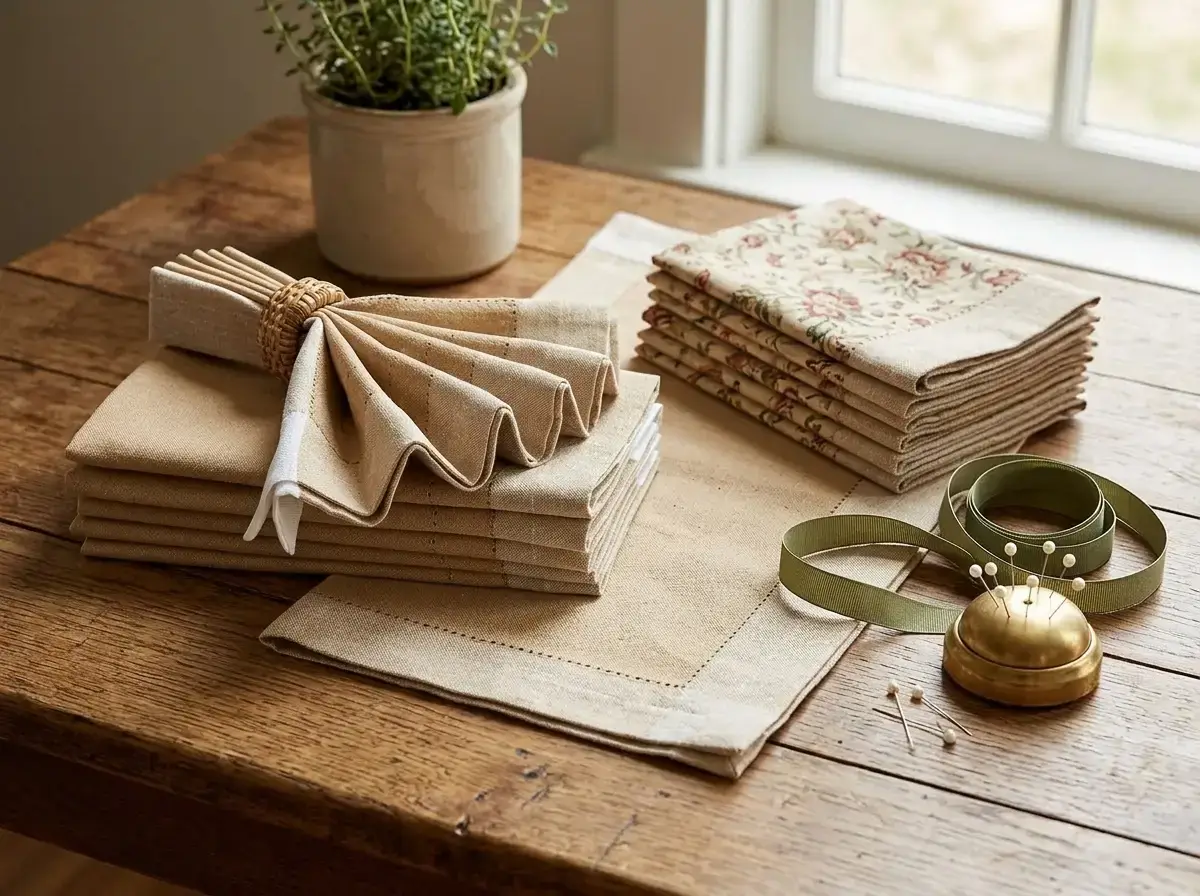
The napkin skirt took over feeds for good reason: it is genuinely easy. Pre-hemmed cloth napkins already have finished edges, so you simply tie or join them at the waist for a flowy, floral, picnic-ready skirt — often with no sewing at all.
Linen and cotton napkins give the best drape and that effortless, lived-in look.
What to look for: a coordinated multi-pack, so one purchase gives you a whole skirt’s worth of panels with the hems already finished. Choose napkins that share one common colour, and the mismatched patterns will still read as a deliberate set rather than an accident.
Pro Tip: Thread a length of ribbon or elastic through the top corners for an adjustable, completely no-sew waistband.
Love the linen but want pockets? That is the one thing the napkin version cannot give you.
A Mid-Length European Linen Skirt
Why We Love It: The napkin skirt is a brilliant trick, but linen is the reason it looks good — and this is the real thing: 100% certified European linen, with an elastic waist, proper pockets and a linen belt. It is the same silhouette the napkin version is reaching for.
Best For: Hot summers, and cooler months worn over tights.
- 100% certified European linen
- XS to XXL, and every size was in stock when we checked
- Elastic waistband, real pockets and a linen belt
Pro Tip: Wash linen cool and hang it while it is still damp. Most of what people dislike about linen is really just how it was dried.
Heads Up: Linen creases, and no finish will stop that. If a crisp look matters more to you than the fabric does, this is not your skirt — and honestly, the napkin version above creases just as much.
The Linen, Without the Napkins 🌿
100% certified European linen
Upcycled Fashion Ideas: Your Questions Answered
Do I need a sewing machine to start thrift flipping?
No. Most of the ideas here are no-sew. Iron-on hem tape, fabric glue, tie-dye, paint, and iron-on patches handle the majority of beginner thrift flips without a single stitch.
What is the easiest beginner thrift flip?
Tie-dye. A one-step kit and a stained cotton tee or tote give you a fresh, colourful piece in an afternoon, and it is almost impossible to get wrong.
Where do I find clothes to upcycle?
Thrift stores, charity shops, yard sales, and your own wardrobe first. For specific raw materials like rigid denim, plain flannels, or cloth napkins, buying a base piece new is a fine shortcut when secondhand comes up short.
How do I make sure my flip lasts through washing?
Always heat-set fabric paint and markers with an iron, let fabric glue cure overnight before washing, and reinforce high-stress areas like knees with a few hand stitches. Wash flips inside out on a gentle cycle.
Which fabrics take dye and paint best?
Natural fibres — cotton, linen, and canvas — absorb colour far better than synthetics. Check the garment label for high natural-fibre content before you dye or paint.
Is upcycling actually better for the planet?
Yes. Every garment you flip is one less piece sent to landfill and one less new item manufactured. Upcycling extends the life of clothing that already exists, which is the heart of zero waste fashion.
Love the Look but Don’t Want to Sew? Buy the Result
Not every day is a crafting day, and that is completely fine. Every piece below appeared somewhere in this guide, and each one was checked in stock on the seller’s own site at the time of writing. Buy the result today and borrow the idea for your own version later — a well-made piece is the best pattern you will ever own.
The Mosaic Maxi ↗
The Linen Skirt ↗
The Wool Coat ↗
The Darning Mushroom ↗
The Mending Guide ↗
The Bucket Hat ↗
The Printed Tee ↗
Your Next Thrift Flip Starts Today
Upcycled fashion is not about being the most skilled person in the room. It is about looking at something forgotten and seeing what it could become. Every idea in this guide proves you do not need a workshop or a sewing course — just a little curiosity and a clear idea of what you are reaching for.
Pick one idea that excited you and give one secondhand piece a second life this week. That first flip is always the one that hooks you.
Keep exploring more upcycled fashion ideas: